|
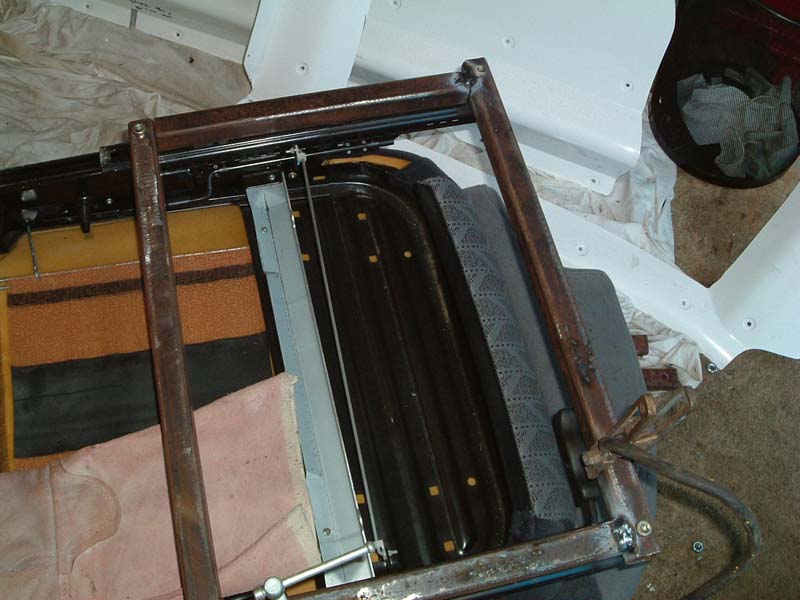
Fitting my seats. The manual tell you to
mount the front of the seats to a raised box section of the floor. To me
the fiberglass seems quite thin here. I decided to mount the seats just
behind this box section, where the fiberglass is quite thick. The problem
with fixing behind the box section is that I need to make a frame to raise the
seats, otherwise they would not slide (due to hitting the raised box section.)
The picture is the frame in progress, attached to the seat rails whilst I weld
it up to get the alignment correct.
.JPG)
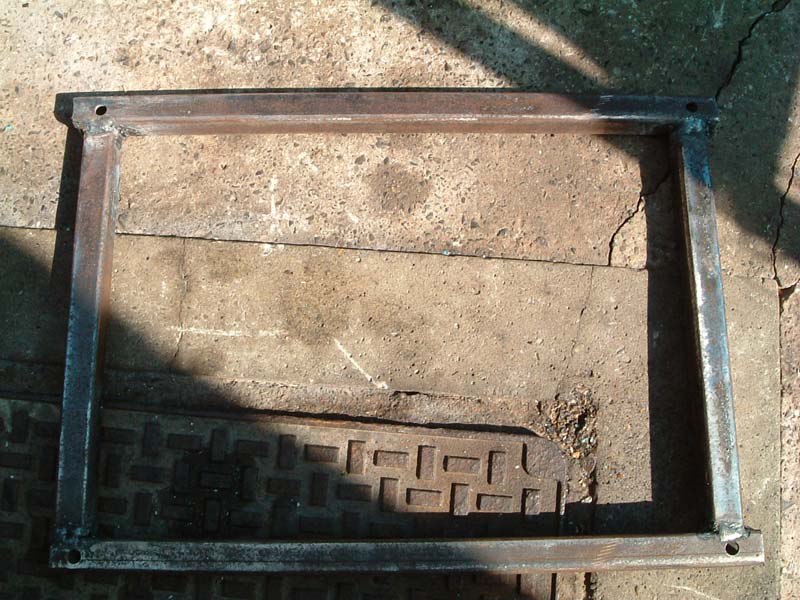
The frame welded up, just needs
some hammerite on it now.
.JPG)
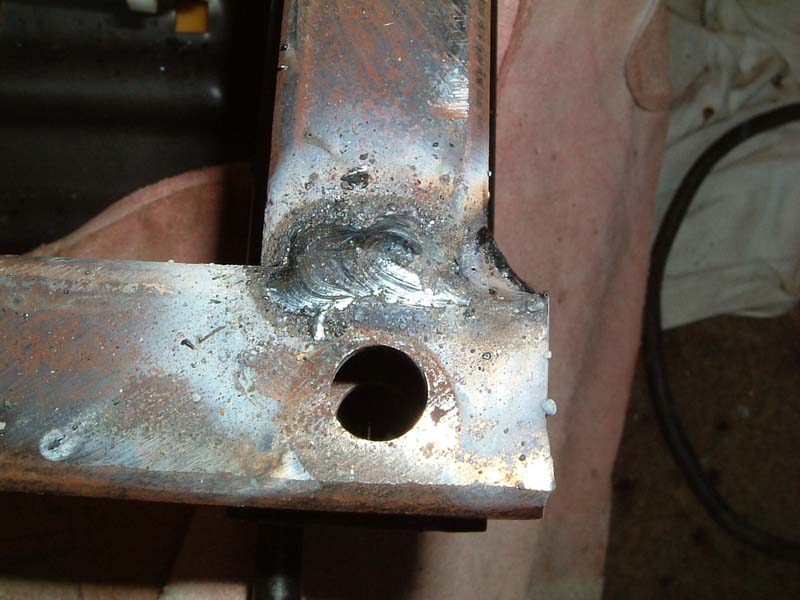
I tacked each corner together whilst on the seat frame, then took it off and finished the welding.
.JPG)
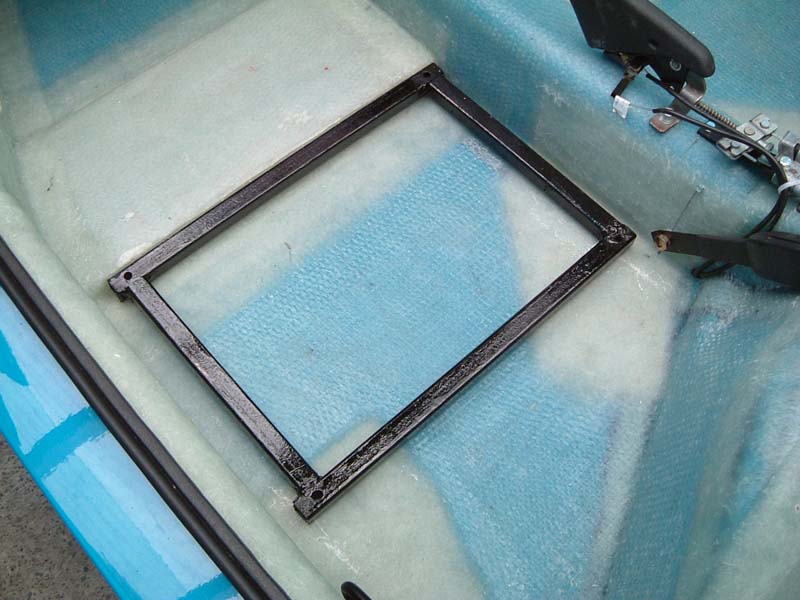
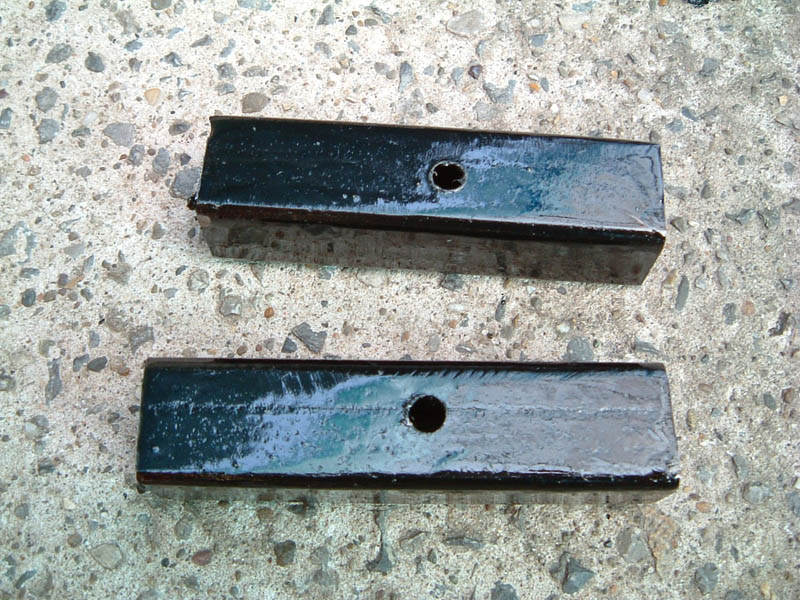
The frame after painting on the
base of the floor. The
floor isn't ideal as its not totally flat. You can see in the picture the
higher and lower points. Underneath the floor I have made spreader plates,
which will sandwich the frame.
.JPG)
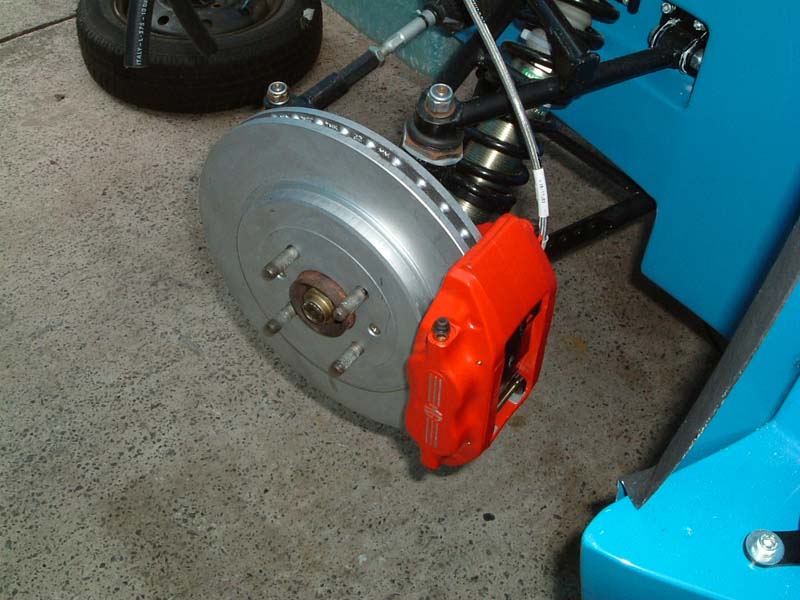
This is my best Ebay
bargain yet! I got a brand new set of MG TF 4 pot calipers, 305mm discs,
pads hubs and stub axle, all for £300. This would sell for over £1000 at
a Rover dealer.
.JPG)
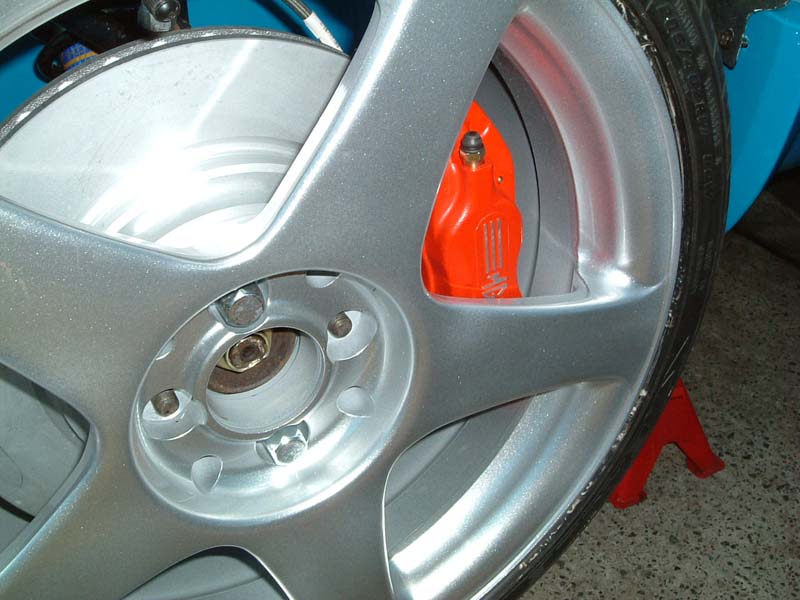
The caliper is quite close
to the wheel, but I'm sure I've seen closer ones!
.JPG)
Trial fit of a wheel to see
what it looks like!
.JPG)
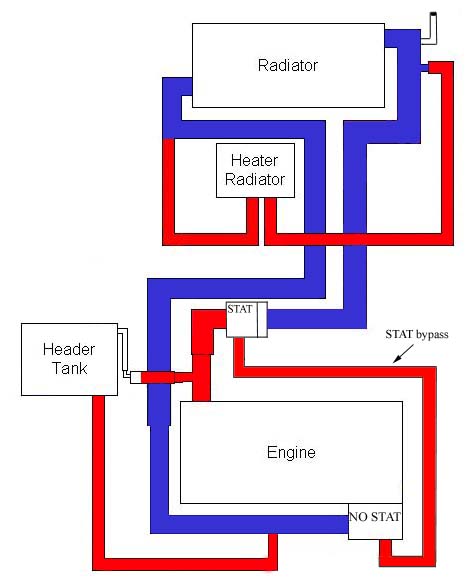
The diagram below shows how
a standard Libra is supposed to be plumbed. I've made a few changes to my
proposed cooling system, as shown in the next picture.
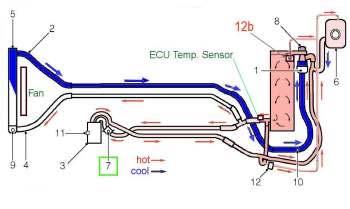
Instead of having four
pipes down the tunnel I have cut it back to two. The heater will be plumed
across the radiator. It wont warm the heater up as quickly, but it will be
slightly less weight and less water in the system which will help as the
K-series water pump isn't that great to start with. I've removed the
thermostat from the original location (the return to the engine) and have fitted
a BMW remote thermostat where the top hose leaves the engine. This stat
has a bypass that will still allow the water to circulate when the 'stat is
closed (normally the heater circuit forms the bypass). I really think that
having the original 'stat at the return to the engine is a bad idea.
Firstly, in a rear engined car where the water needs to travel to the front, go
through the radiator and back, then hit the 'stat, imagine how hot the water
leaving the top hose of the engine must be to open an 88 degree 'stat at the
return of the engine! You also get a thermal shock situation, as the the
water leaving the head of the engine is very hot, so is the oil in the sump,
then suddenly when the 'stat opens and rush of cold water enters the engine, the
'stat closes and creates a thermal shock. This could possibly be why
k-series engines are prone to head gasket failure!? Having the 'stat where
the water leaves the engine should eradicate all this and create a much smoother
temperature fluctuation in the engine.
.jpg)
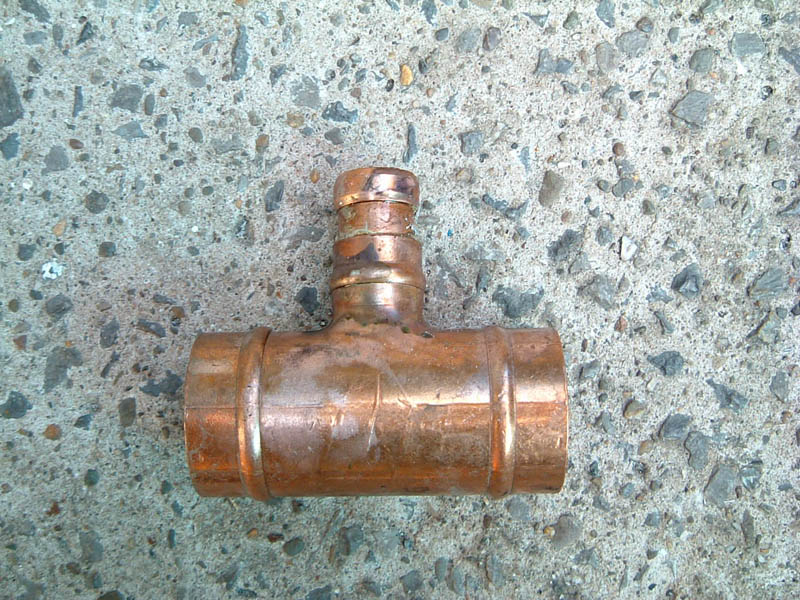
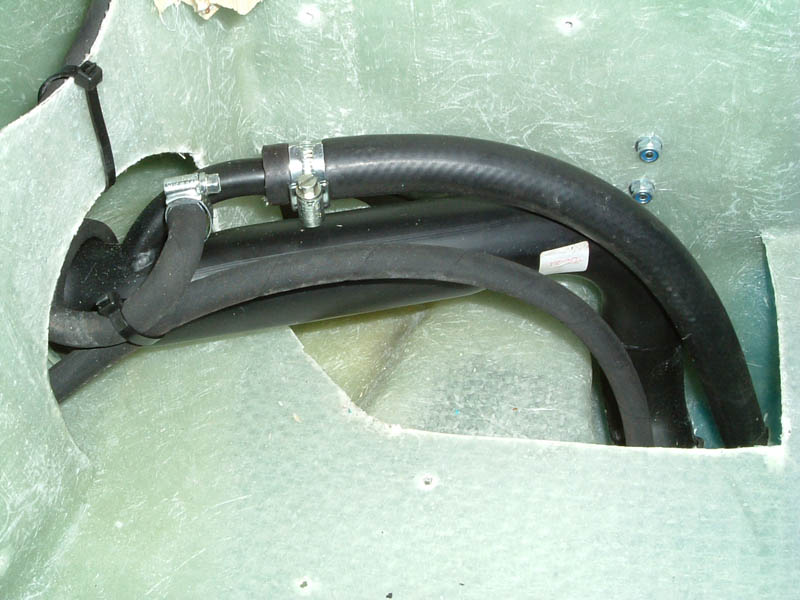
I made these 'T' pieces up
to tee the heater pipes into the main radiator circuit at the front. I
extended the 15mm exit as it didn't have enough length on it to fit a Jubilee
clip onto the heater hose.
.JPG)
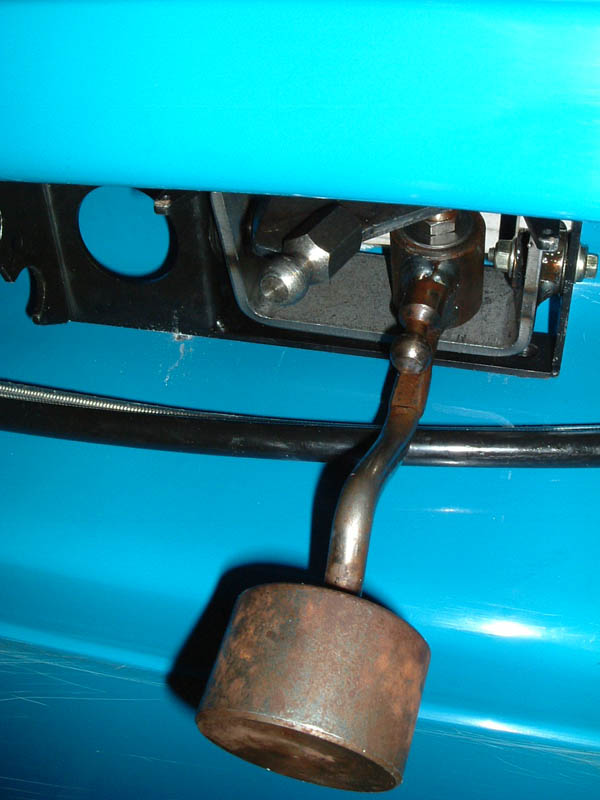
My battery box and spare wheel
holder are not touching the base of the radiator molding and so are resting on
the radiator fan. I made these spacers to put under the legs of the
battery box to just lift it off the fan. I just hope I have enough
clearance when the bonnet is shut.
.JPG)
I've decided to fit the
cable gear change from an MGF instead of the solid rod change that GTM supply
with the kit. The large assembly in the picture is the standard MGF change
mechanism along side the bracket that GTM have made for me. The
internals from the MGF bracket fit into the neater GTM bracket.
.JPG)
This is the cable gear
change mechanism fitted to the GTM bracket, mounted in the tunnel. The
weight is to give the change a bit of momentum to help it feel more precise, but
I think I'll have to cut the weight off as I can't see there being enough room
for it. I could just use a heavy gear knob instead!
.JPG)
The cable gear change mechanism
from inside the car.
.JPG)
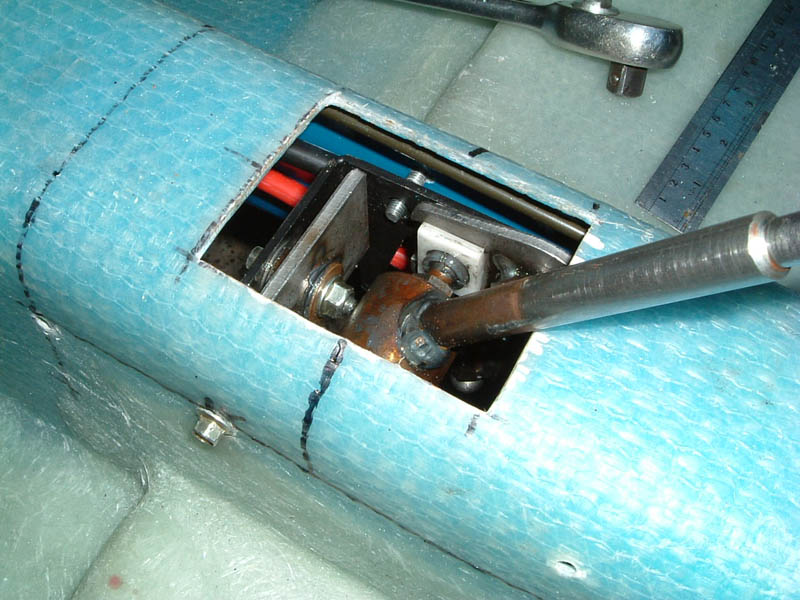
All the wiring is fitted to the
tunnel along with the gear change bracket.
.JPG)
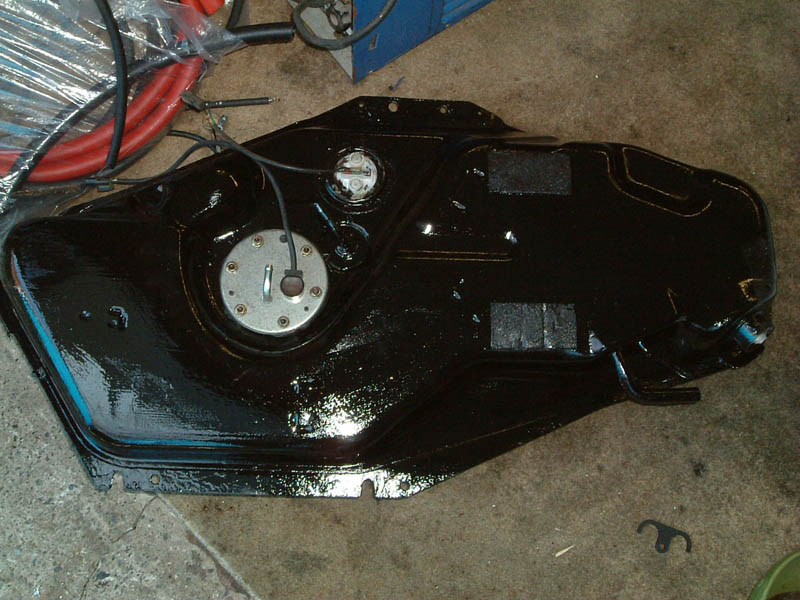
It's taken me a long time
to track down a suitable fuel tank. A new one is over £300! My
donor car was a carb version and so are most Metros in scrap yards. I
found it quite hard to find an injection fuel tank in good condition. This
one had some surface rust, but after a brushing down and a couple of coats of
hammerite it looks good enough. The main filler pipe and breather pipes
are shortened and the smaller breather pipes are closed off. My FSE up
rated fuel pump has also been fitted.
.JPG)
The pipes from the fuel
filler are all connected to the tank now. The largest pipe is the main
fill and the middle sized pipe is the breather from the tank. The small diameter
vent pipe runs from a 'T' at the top of the breather, up the side of the
monocoque then back out into the open air.
.JPG)
|